CI/CD in AWS in Detail + Implementation ! PART 1


The Old way:
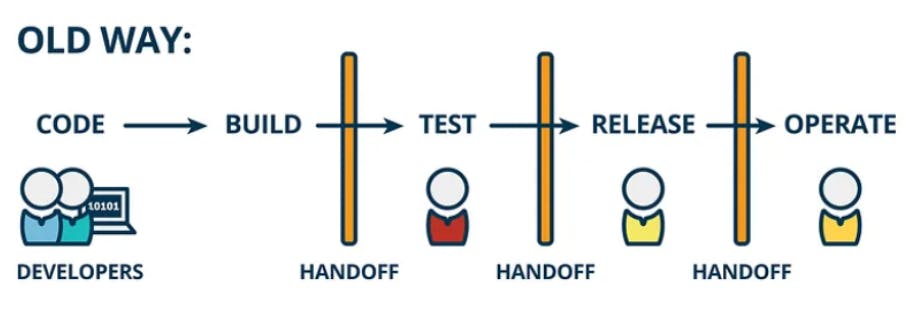
Pushing the final accurate code to the production server is quite a tedious task. After the developer gives the code to the operation team, for deployment there are several manual tasks in between like building and testing to identify issues in the code. If the issues are identified, then send the committed code back to the developers for correction. Finally, deploying the code to the server. This monotonous cycle repeats itself whenever there are code changes.
Hence, there is a need of automating these tasks to ensure efficient and smooth deployment of committed code. That's where CI/CD comes into play!
What is CI/CD?
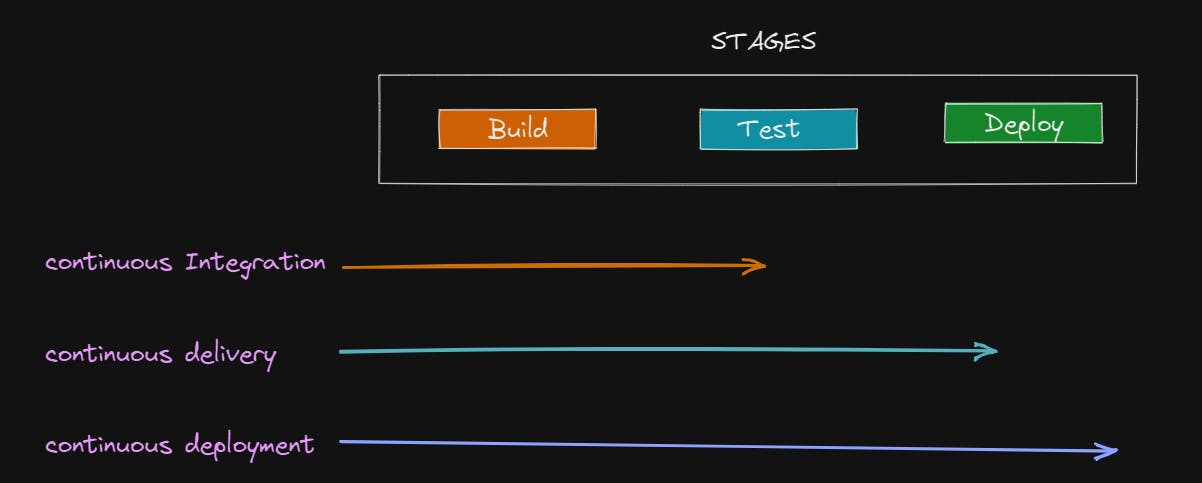
CI stands for Continuous Integration
CD stands for Continous Delivery/Deployment
This diagram shows the stages within the above processes:
In very simple terms:
Continuous Integration is a process where team members integrate their work/code continuously in a shared repository. This is done using tools like Git. Every integration is then validated by an automated build, automated unit or integration tests.
Developers just have to push their code and don't have to build or test the code themselves!
Continuous Delivery happens after the CI process. This involves deploying on a production-like environment and running automation tests to ensure the build is ready for release. Continuous delivery aims to ensure that the build is always in a deployable state.
Continous Deployment is fully automated. Every code change is directly deployed to production without manual approval. Basically, every change that passes through the automation tests is deployed to production.
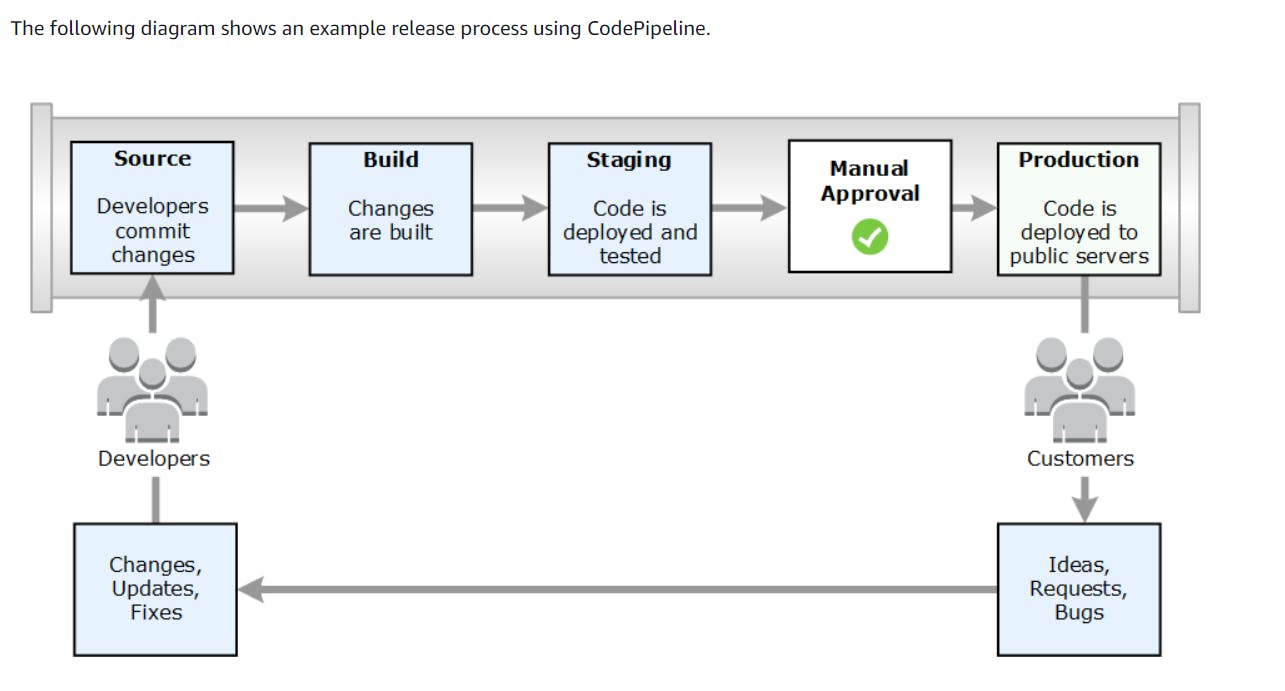
CI/CD Pipeline
If we chain all the processes involved in CI/CD with an Automated trigger, it's termed as CI/CD Pipeline.
Detailed CI/CD Through AWS!
Architecture:
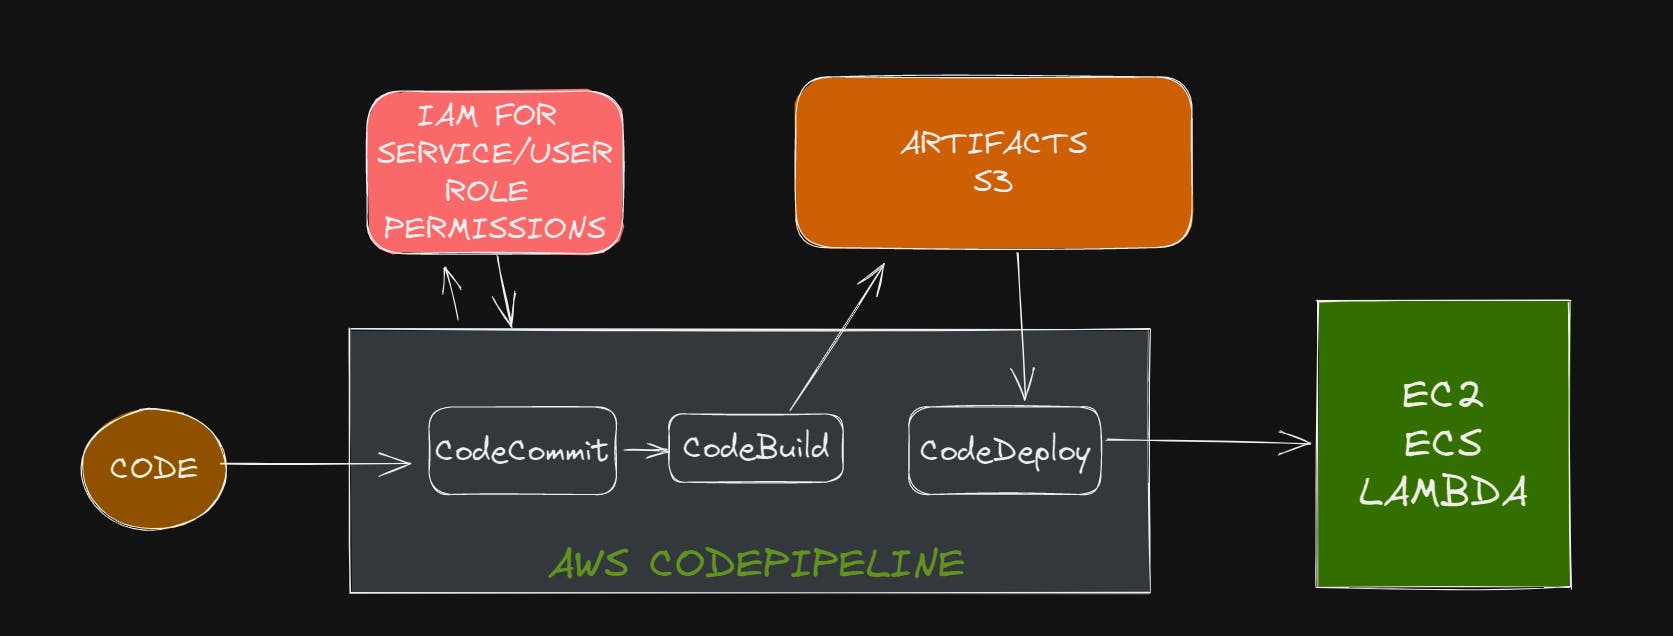
3 Main steps/phases involved:
CodeCommit
CodeBuild
CodeDeploy
Let's start our journey of making a CI/CD pipeline! Firstly, we will need to create an empty repository where we will push the source code files of our application.
GitHub is one such common tool for doing the same. But, we are gonna do the same using CodeCommit. CodeCommit is similar to GitHub since it stores anything from code to binaries. It supports the standard functionality of Git, so it works seamlessly with your existing Git-based tools.
Set up your AWS Console and get ready to get your hands dirty on these services!
CodeCommit
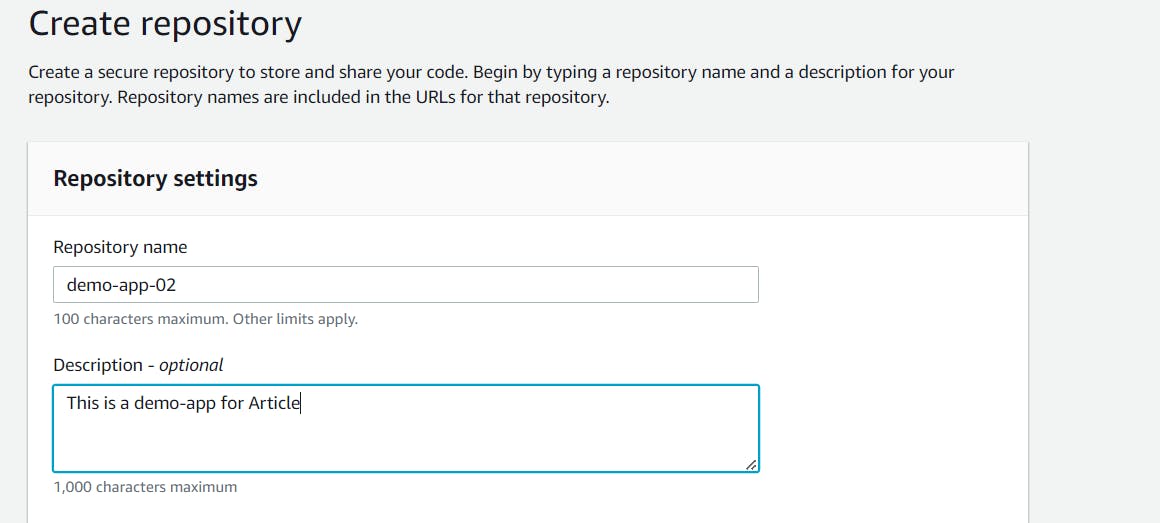
On your console, go to CodeCommit --> Repositories --> Create Repository. Simply, fill in the Repo details as shown below and click on Create.
Once you create it, you will see the below message. This means you cannot interact with the service being a root user.
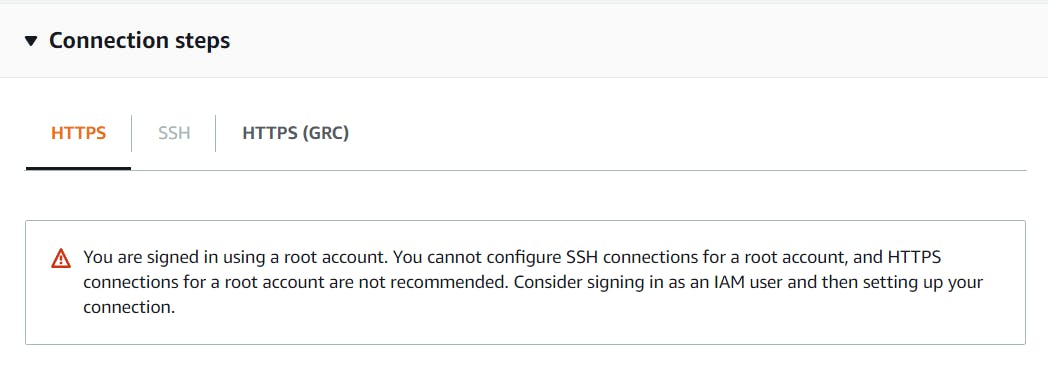
To solve this, we will need to create an IAM (Identity and Access Management) user with permission/policy to use this service. Read more about IAM here: https://aws.amazon.com/iam/
For creating an IAM user, on your AWS console, go to IAM --> Users --> Add Users. Fill in as follows and click on Next.

Set permissions page will appear. Keep on clicking Next, since we do not need to configure something in between, and finally, click on Create user.
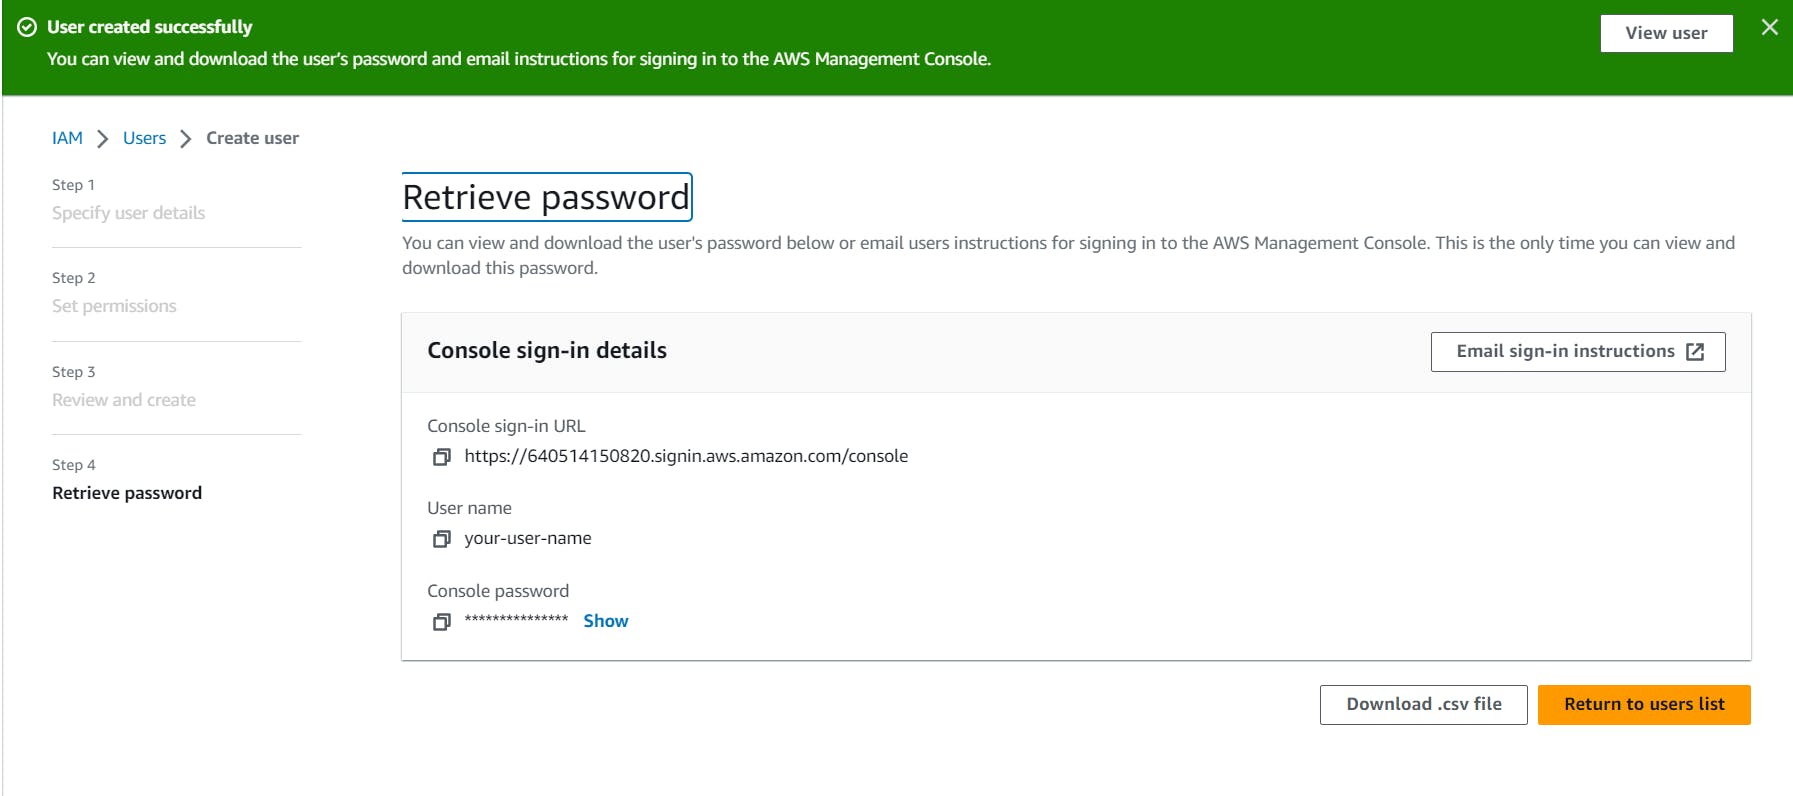
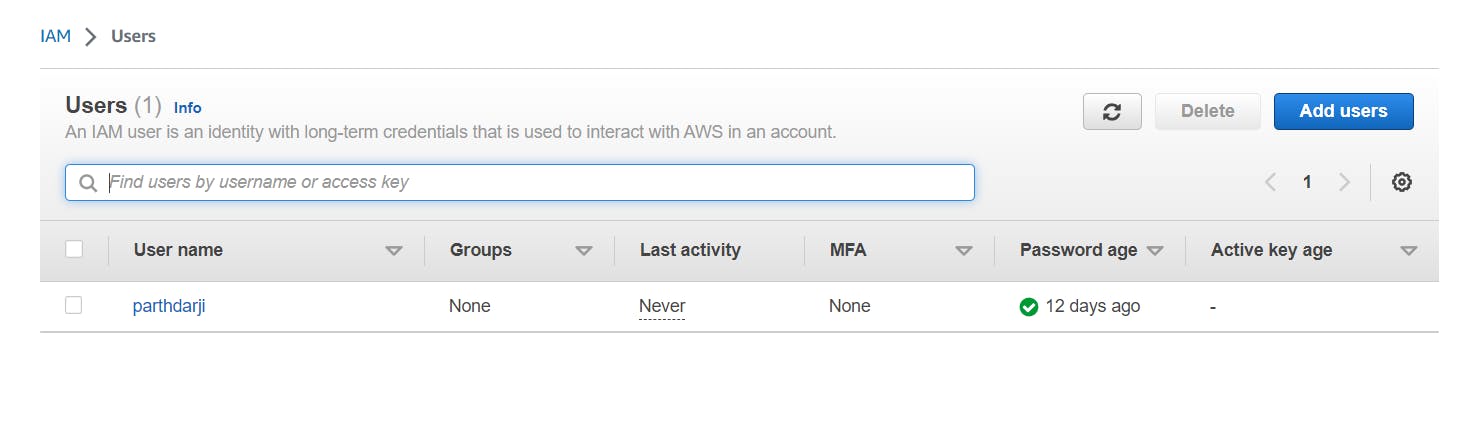
Download .csv file consisting of your user credentials. Finally, our created user will appear in Users section in IAM.
We have finally created our IAM User! Now, we got to do two things:
Give the user permission to use the CodeCommit Service and,
Generate HTTP credentials for accessing our created Repo in CodeCommit.
For the second part,
Click on your user, and go to the Security credentials. Scroll down to the HTTPS Git credentials for AWS CodeCommit. Click on Generate credentials and download them. These will be used to access the Repo when we clone it into our machine.
For the first part,
Go to the Permissions section, click Add Permissions. Select "Attach policies directly". Now we need to search for a policy named AWSCodeCommitPowerUser. This will allow our IAM user to access and use CodeCommit Service.
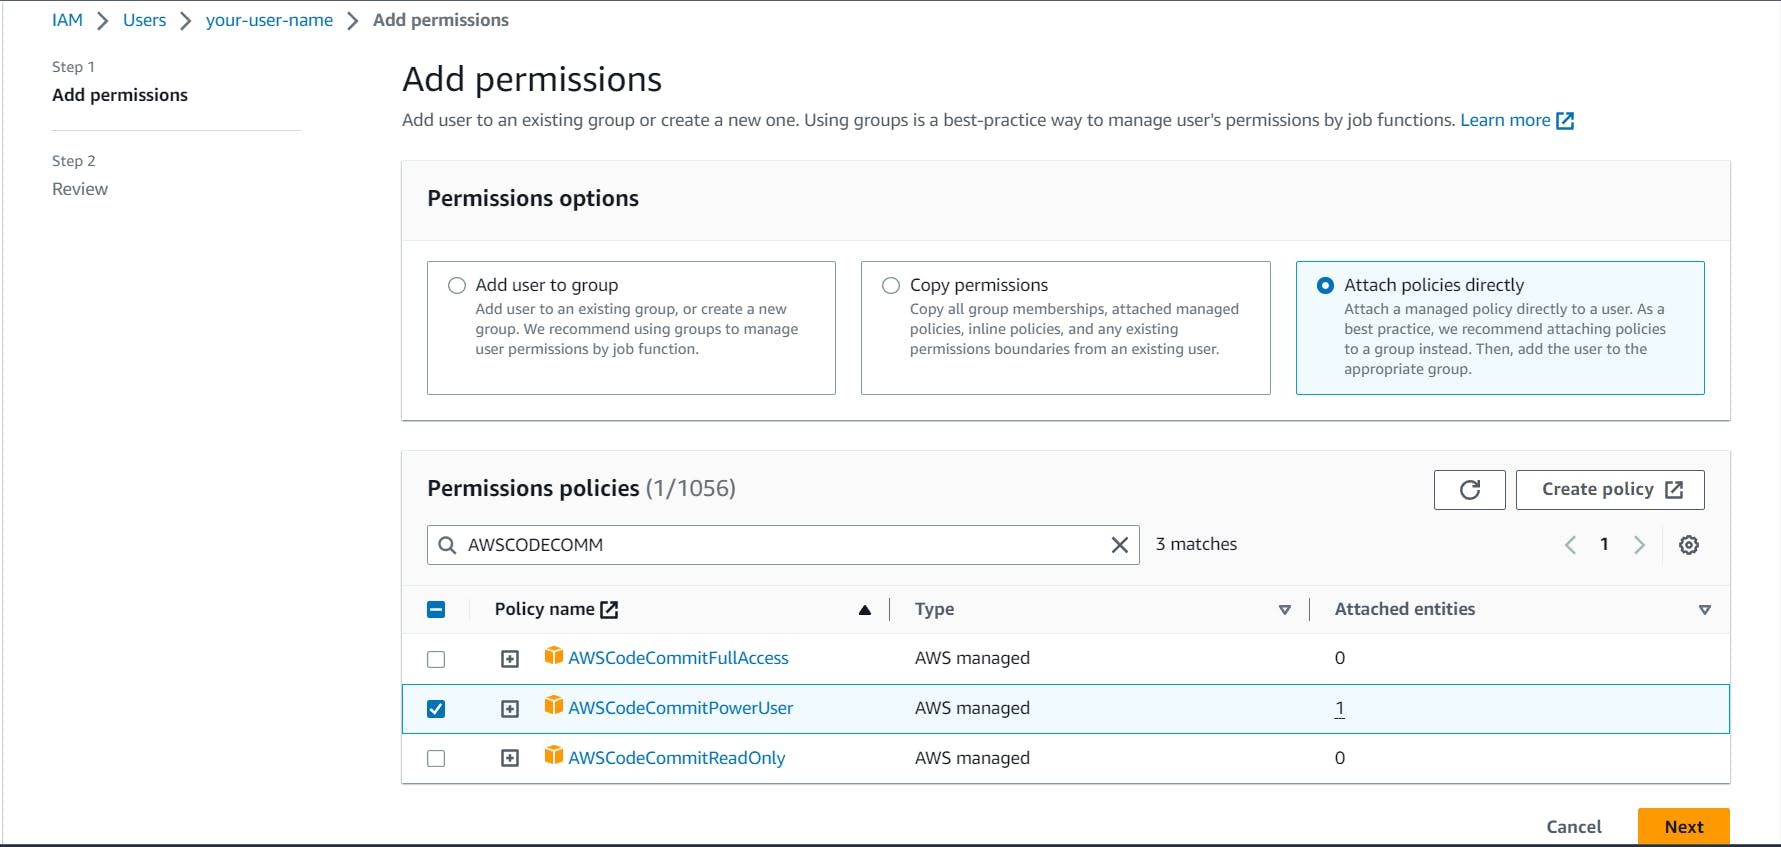
Finally, click on Next --> Add permissions. We are done with some complex stuff, now we will clone the repo and add files to it! Clone HTTPS URL as shown below.
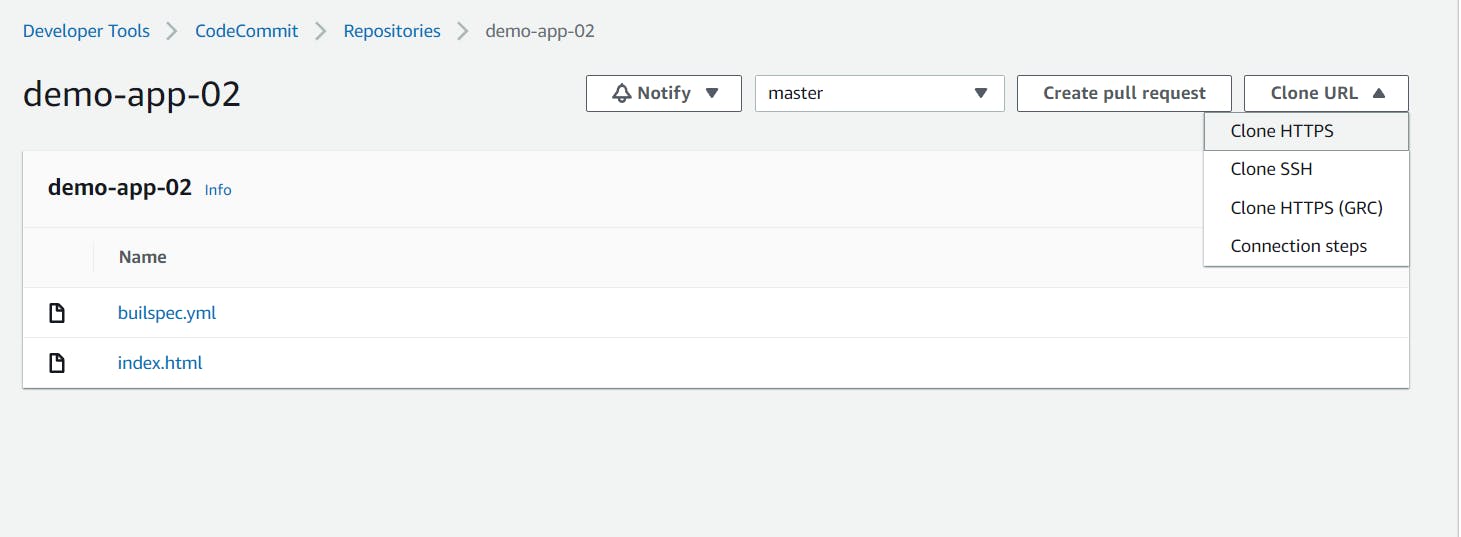
Into your local system, clone the repo at appropriate location. Once inside the root folder, open your VSCODE/Code-editor, and in the terminal type the command: git clone *paste your url\.*
It will ask for credentials now, enter the credentials that we downloaded in the HTTPS Git credentials for AWS CodeCommit part!
Now we will simply add a HTML, file to our cloned repo folder. We have index.html with us!
<!DOCTYPE html>
<html lang="en">
<head>
    <meta charset="UTF-8">
    <meta http-equiv="X-UA-Compatible" content="IE=edge">
    <meta name="viewport" content="width=device-width, initial-scale=1.0">
    <title>Demo-app-02</title>
</head>
<body>
    <h1> Hello World! </h1>
</body>
</html>
Now, we need to push this to our Repo in codeCommit. We will use the same commands that we use in Git!
git add .
git commit -m "first commit"
git push origin master
We will need a buildspec.yml file, which provides configurations for building code. Refer to more details here about buildspec file: https://docs.aws.amazon.com/codebuild/latest/userguide/build-spec-ref.html
We have a builspec.yml file here, make sure you add it and push it to your codeCommit repository.
version: 0.2

phases:
  install:
    commands:
      - echo Installing NGINX
      - sudo apt-get update
      - sudo apt-get install nginx -y
  build:
    commands:
      - echo Build started on 'date'
      - cp index.html /var/www/html/
  post_build:
   commands:
    - echo Configuring NGINX

artifacts:
  files:
    - /var/www/html/index.html
CodeBuild
CodeBuild compiles your source code, runs unit tests, and produces artifacts that are ready to deploy.
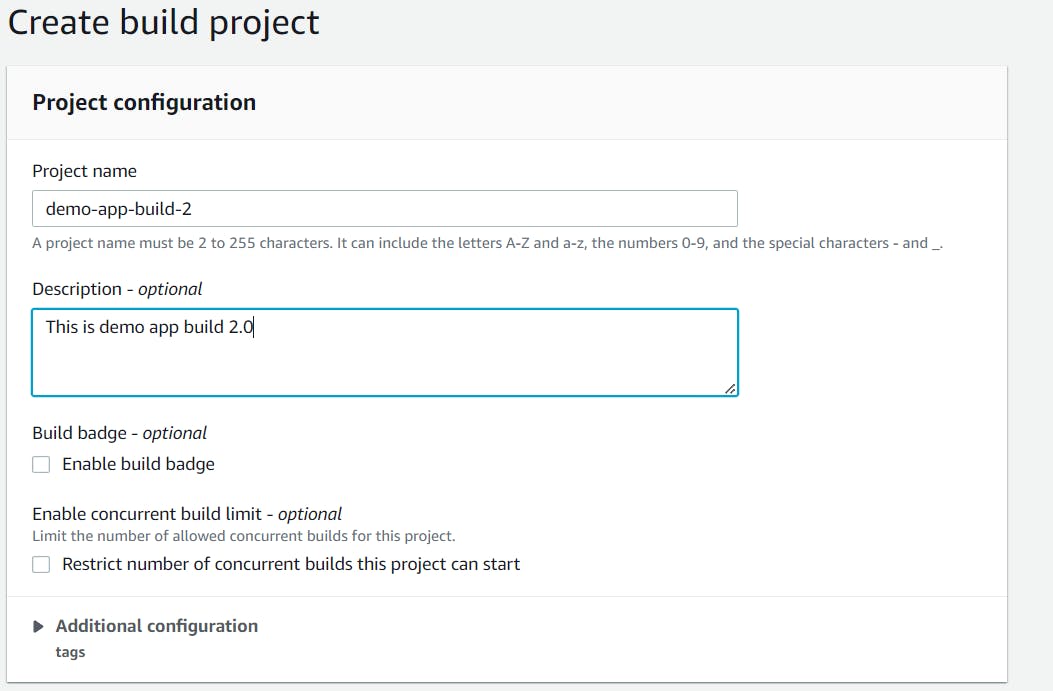
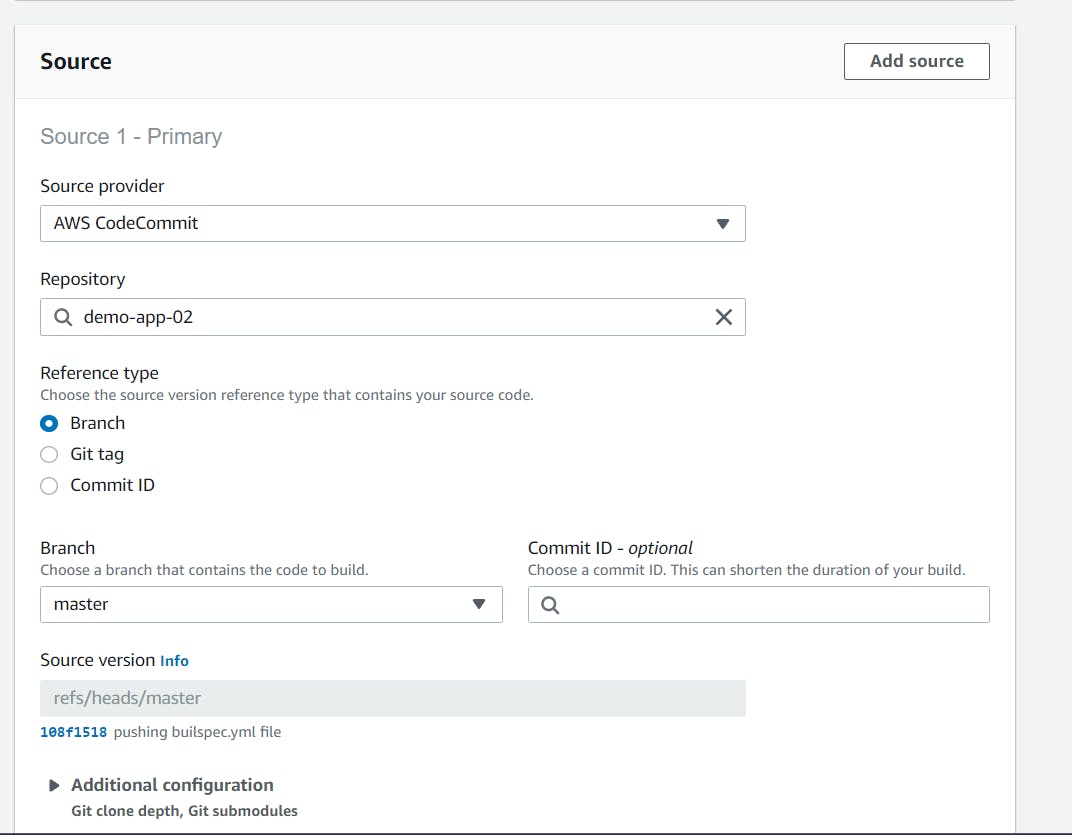
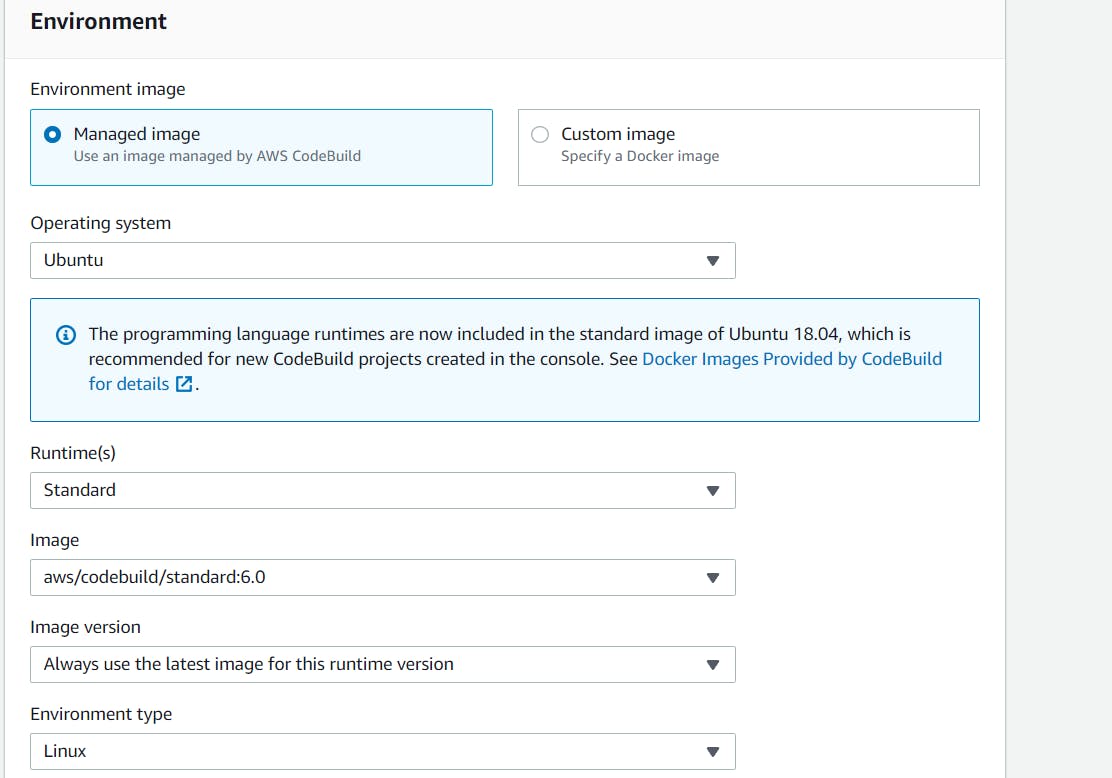
Go to CodeBuild --> BuildProjects --> Create build project. Set the configurations according to the images attached.
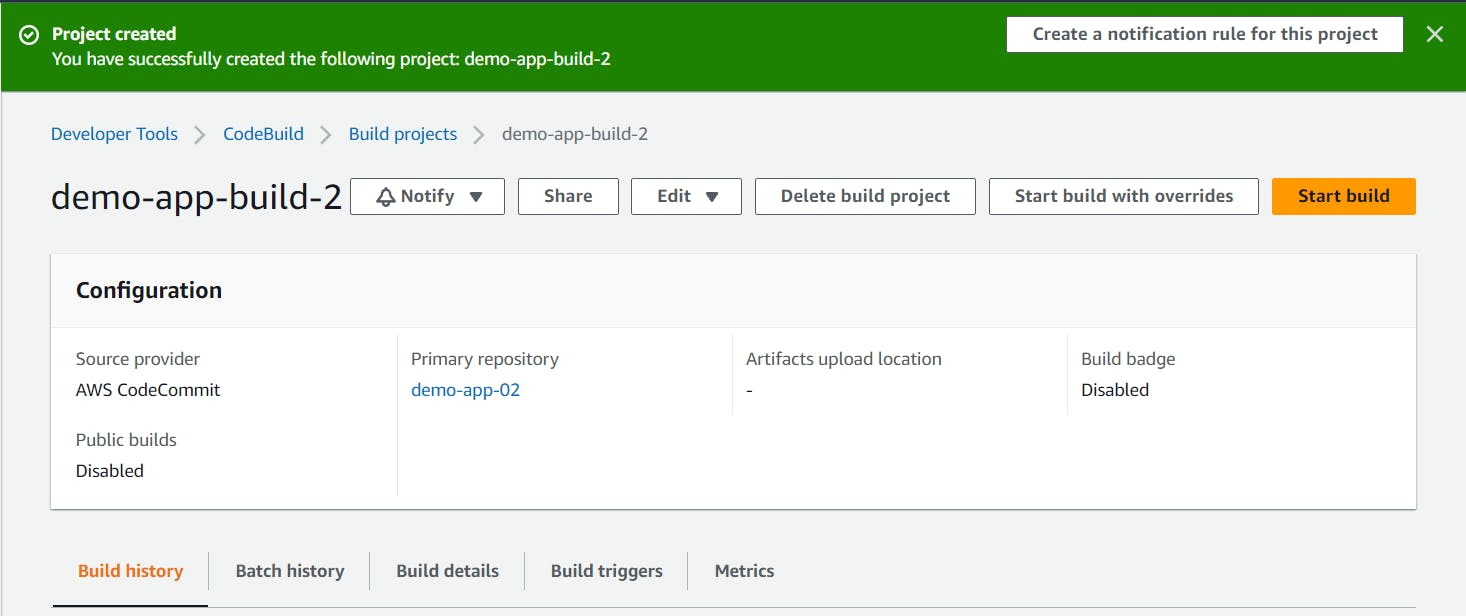
Finally, click on build project! Now we will click on Start build.
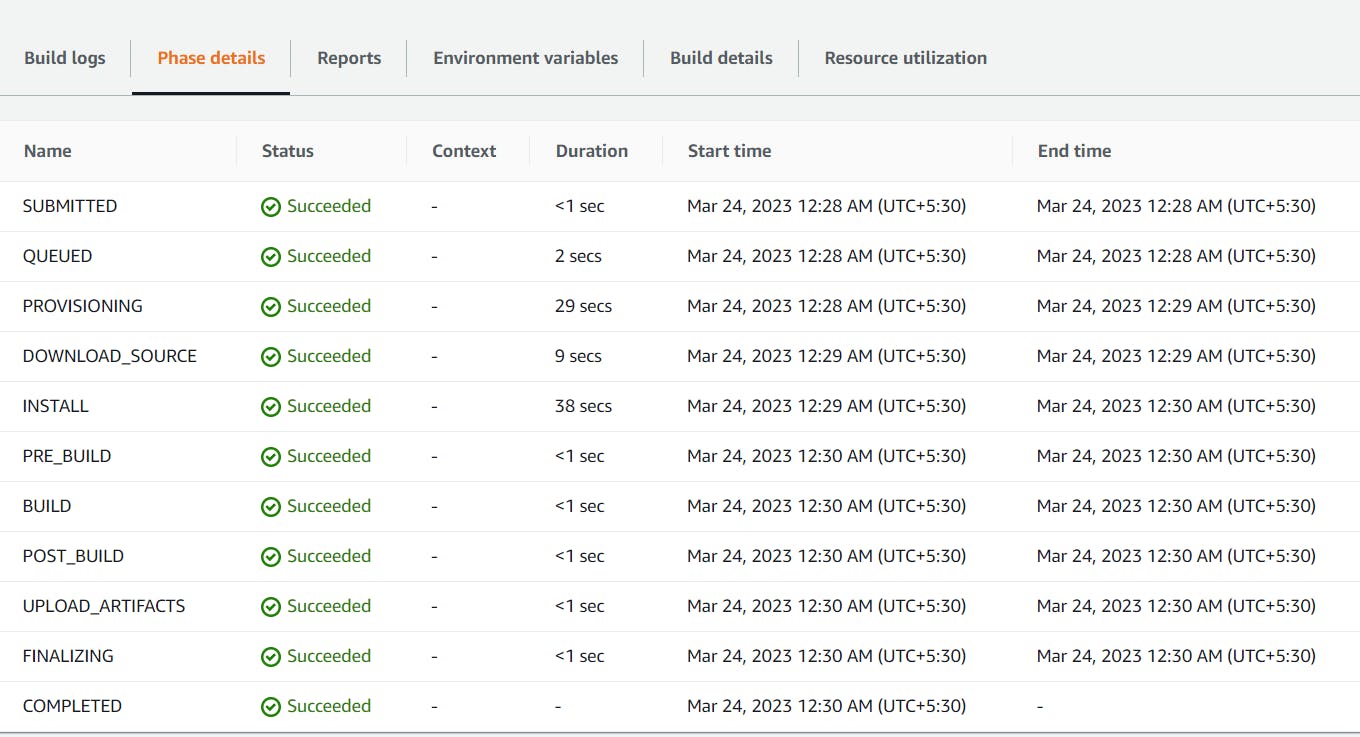
It will start building our app. Go to phase details, which would display progress on the build process. After successful completion, you will see sucseeded status for each phase! We are already halfway!
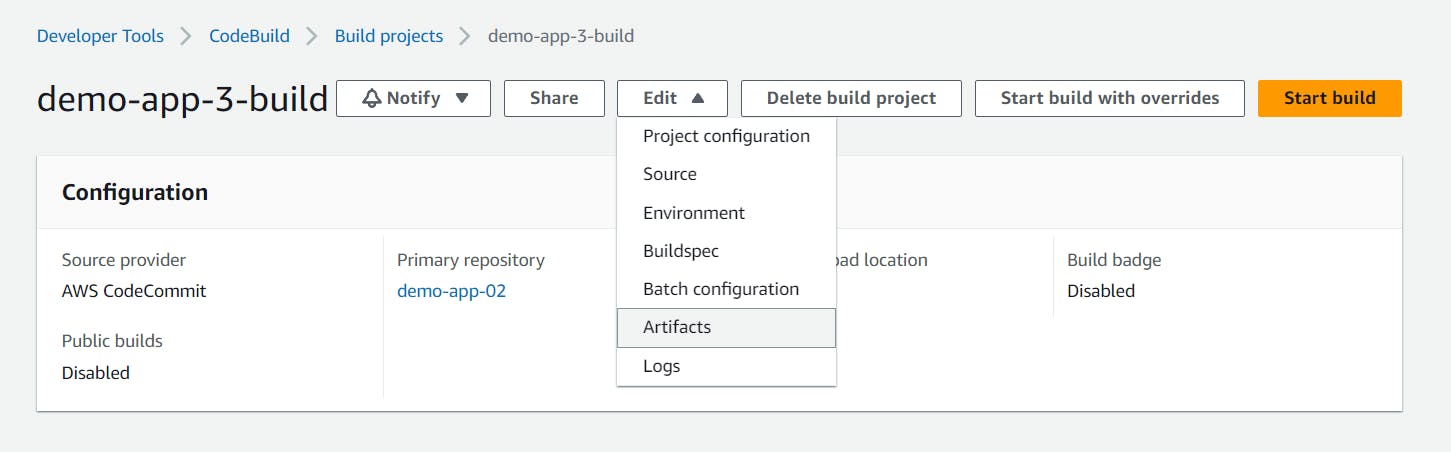
Now, we need to stores these build somewhere. We will use S3 service for the same. S3 will create storage place called "bucket", which will stores our builds. Go to your build--> Edit --> Artifacts.
You will need a bucket for storage. If you don't have one, refer to this link: https://docs.aws.amazon.com/AmazonS3/latest/userguide/creating-bucket.html
Fill the details as follows, under the bucket name, click on your created Bucket.
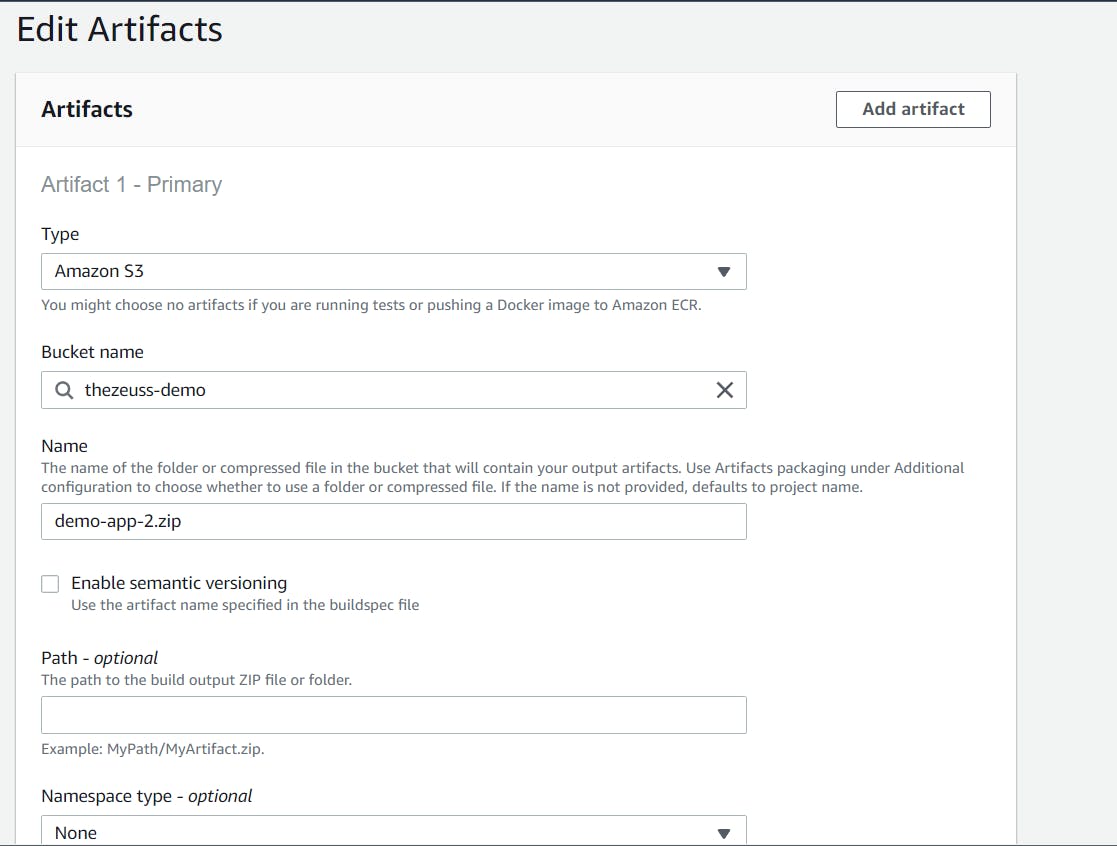
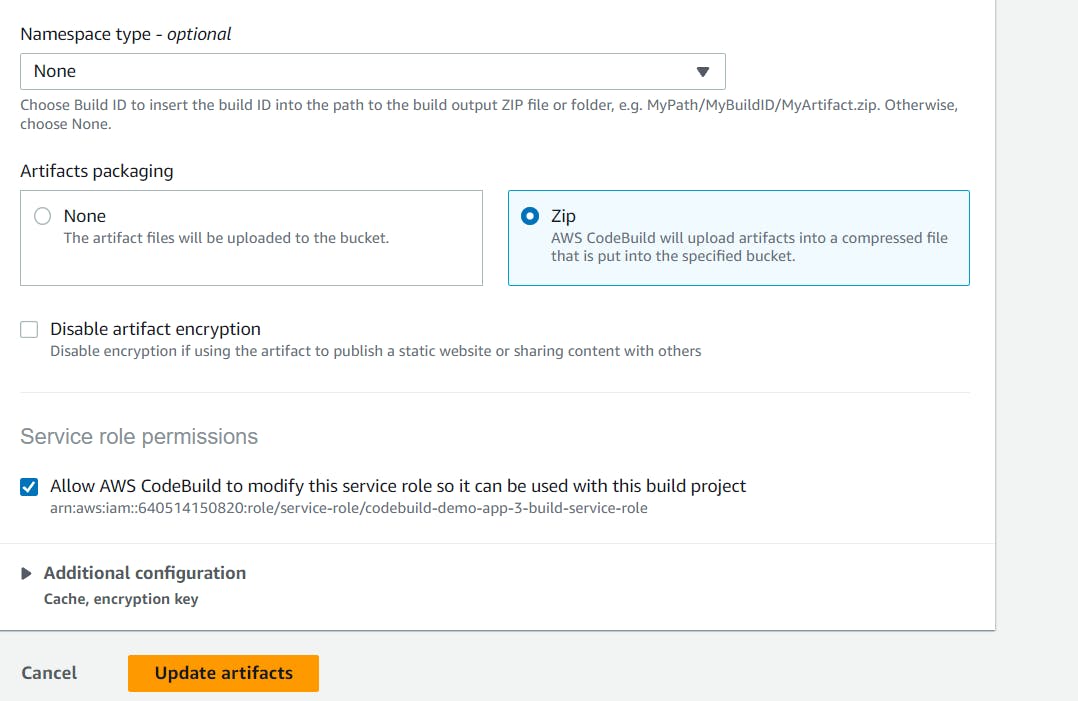
Click on Update artifacts.
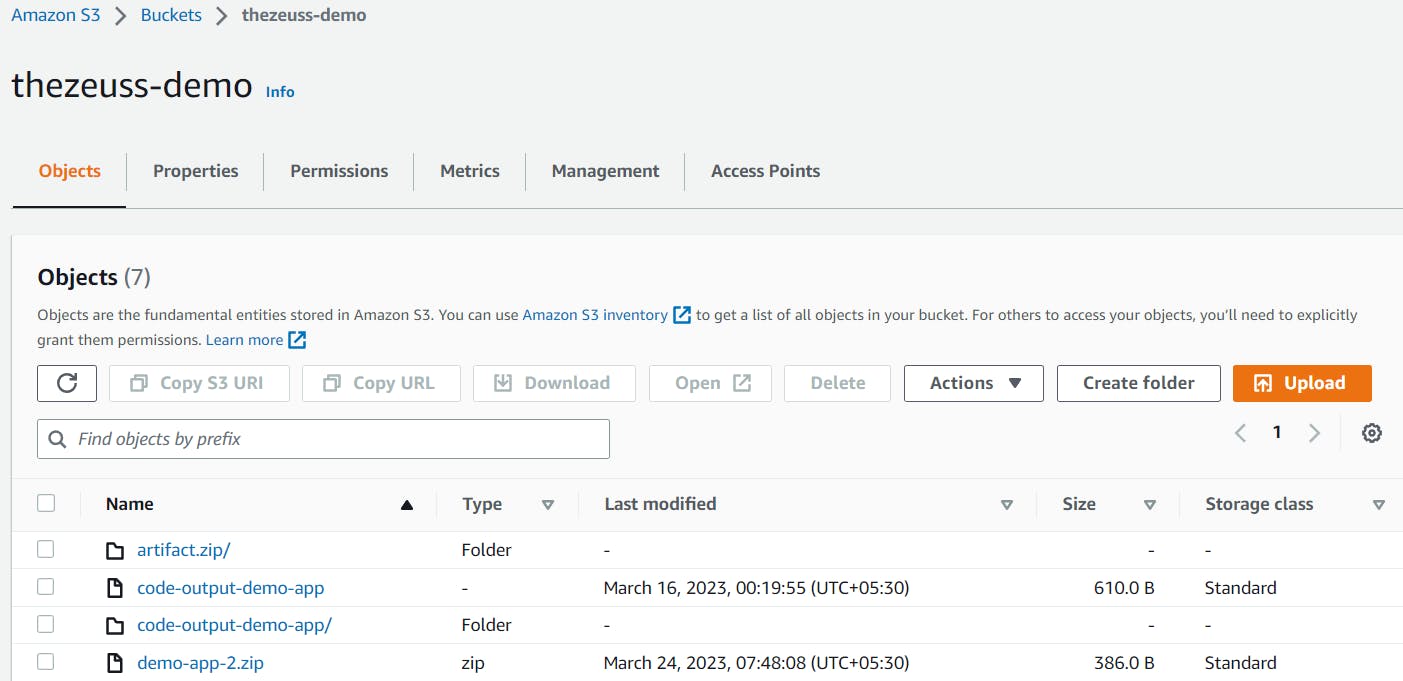
Build your project again, so that we generate the zip file of the build, which we be stored in our s3 bucket!
After the build is successful, go to your bucket, and as shown in the image below, we have our demo-app-2.zip file in our bucket named, thezeuss-demo!
We have successfully completed CodeCommit and CodeBuild! Now we will move on to our third step, involving deployment in the next part of Article!
Thank you for having a dedicated read, and cheers for getting ahead till here! See you in the next part where we will deploy our app/source code on an EC2 instance and finally, setup a codePipeline for linking every stage!
Bye! <3